How To Burn and Dodge Portraits In Photoshop

Burning and dodging photographs originate from the darkroom photography practice of exposing certain areas of a print to light more or less than the other to enhance the darkness or lightness of an image. Burning makes specific areas of the image darker while dodging makes parts of the image lighter. This is a great way to create vignettes around an image.
Photoshop makes this technique quick and painless compared to using the darkroom technique. In this tutorial post, I will be showing you ways to use Photoshop to Burn and Dodge areas of your photos.
Burn and Dodge with 50% Gray Layer
1. Add a New Layer, Rename it to BnD (or whatever name you like)
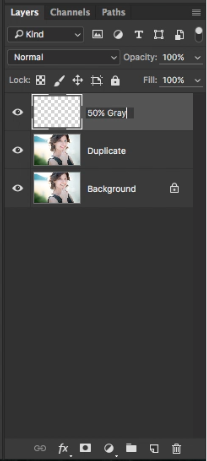
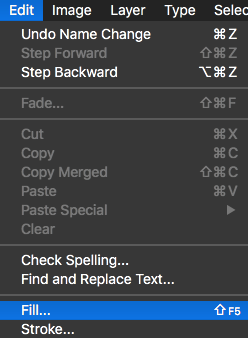
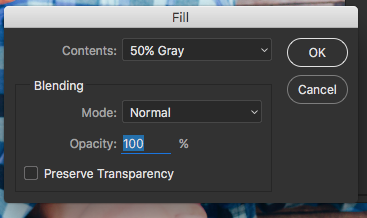
2. Go to Edit > Fill > Set Contents to 50% Gray > Click Okay
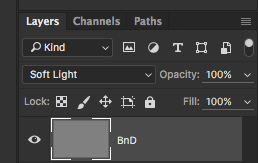
3. Change the Blending Mode of the 50% Gray layer to Overlay or Soft Light
Tip: Overlay blending mode has higher contrast than Soft Light. Soft Light is less dramatic looking.
4. Grab the paint brush tool and make sure you Foreground Color is Black and Background Color is White
Tip: Use _______ Shortcut to make the Foreground black and Background White
5. Lower the opacity and flow of the Brush
I normally stay between 25%-50% opacity and 50% flow

6. Paint black to darken areas and paint white to lighten

7. Adjust the opacity of the Burn and Dodge Layer as needed
You can also use the actual Burn and Dodge Photoshop tools on the 50% gray layer. Not my favorite way, but if you do so; I’d recommending setting the Exposure of both tools to 25% before using them.
Burn and Dodge with Curves Adjustments
1. Add a Curves Adjustment Layer, Rename it to Burn
2. Drag the center of the Curves’ line downwards to darken the image
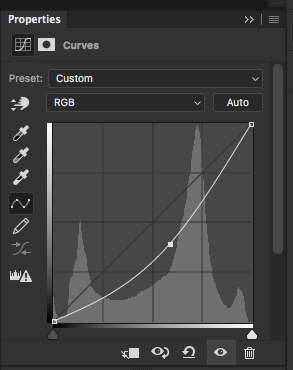
3. Invert the layer mask of the Burn Layer (Shortcut: Cmd + I)
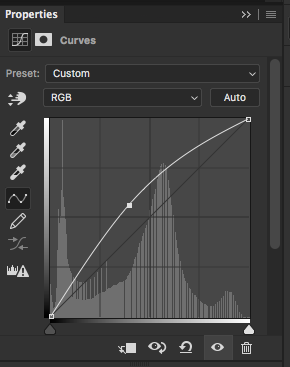
4. Add a new Curves Adjustment Layer, Rename it to Dodge
5. Drag the center of the Curves’ line upwards to lighten the image
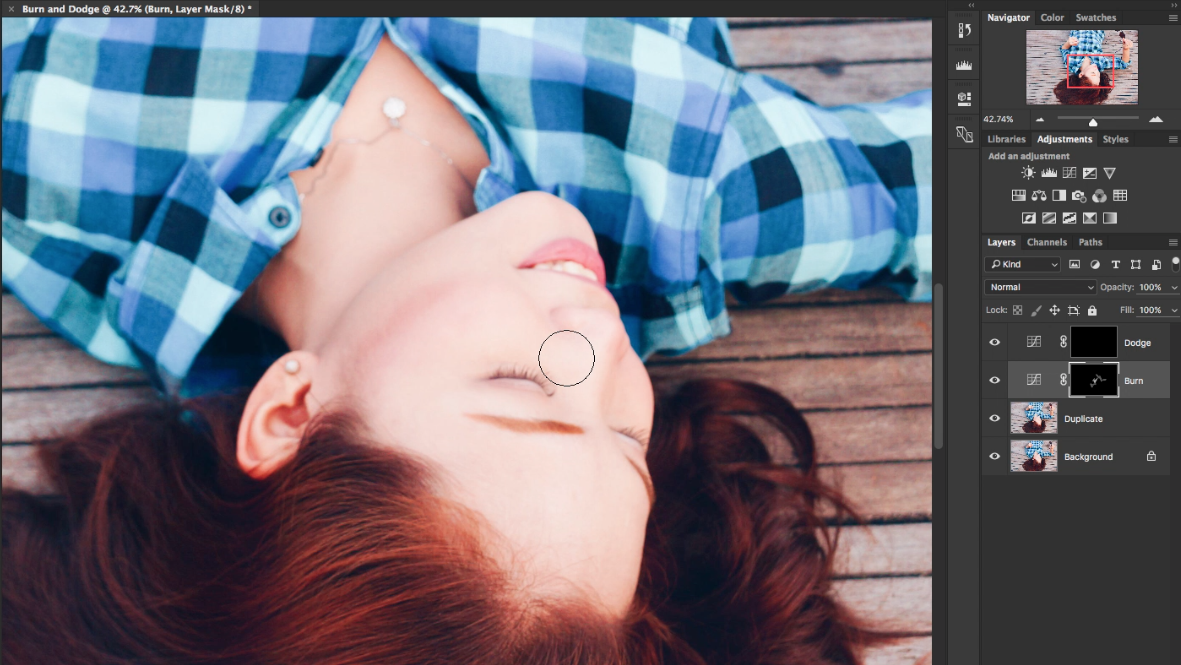
6. Invert the layer masks of the Curves Layers
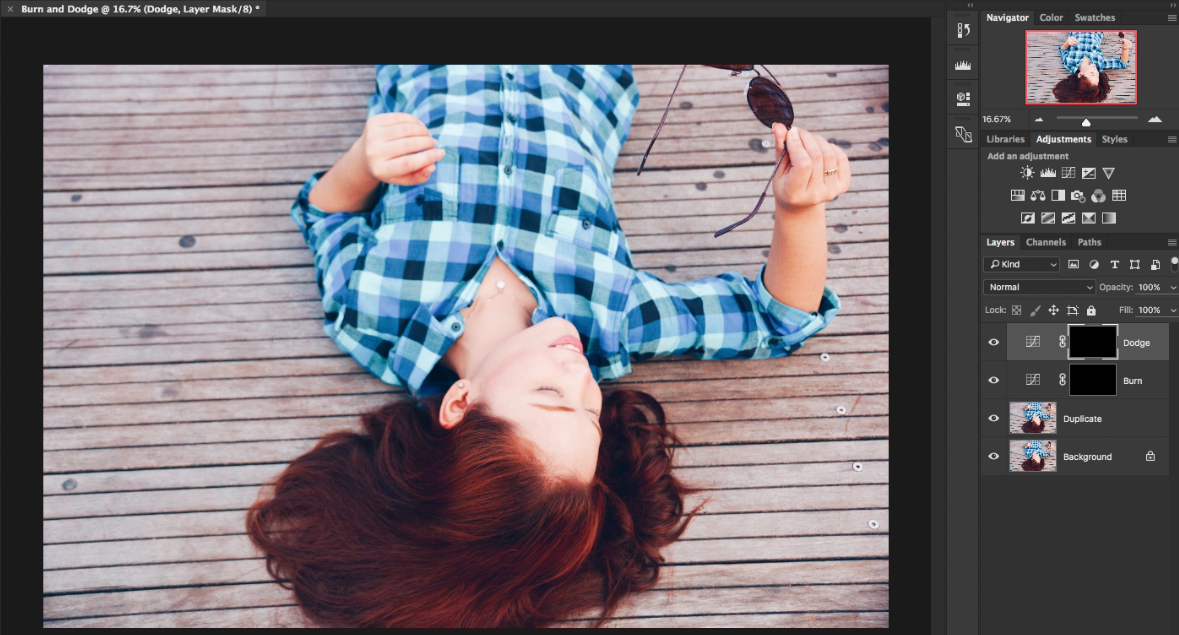
7. With the Brush Tool, paint White to reveal the darker areas on the Burn layer and paint white to reveal the lighter areas of the Dodge Layer
8. Adjust opacity and blending modes as needed
I hope you guys found this tutorial helpful! There are variety awesome ways to approach burning and dodging including the ones in this tutorial, so I always urge people to find which ways work best for them. Have you tried these techniques or plan to use them? Are there any other Burning and Dodging Photoshop techniques you prefer using or would like to learn. I would love to hear your thoughts in the comments down below! Happy Retouching!